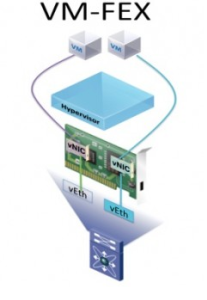
 Once the configuration on Cisco VIC adapter is done, we need to do certain configuration settings on Nexus switch to enable VM-FEX. In this section we discuss more on the configuration settings that needs to be done specifically on on Nexus 5000 Series switch to enable VM-FEX. We also discuss on settings that needs to be done on ESXi to enable VMFEX.
A VM-FEX license is required for Cisco Nexus device. The license package name is VMFEX_ FEATURE_PKG. Incase if you are just interested in experimenting with this cool feature, a grace period of 120 days starts when you first configure this feature.
We have to do the following configuration on Nexus 5000 switch:
- Enable VM-FEX and other related services
- Define port profiles for dynamic Virtual Machine ports
- Enable vntag on applicable ports
- Install Cisco_nexus_vmfex plugin in vCenter
- Configure SVS connection to vCenter
- Activate and verify the SVS connection
In this document, the procedures/commands are from 5596 switch. Though the commands are standard across Cisco Nexus Switches. In case of confusion, please refer the documentation from Cisco.com
Enable VM-FEX and other related services
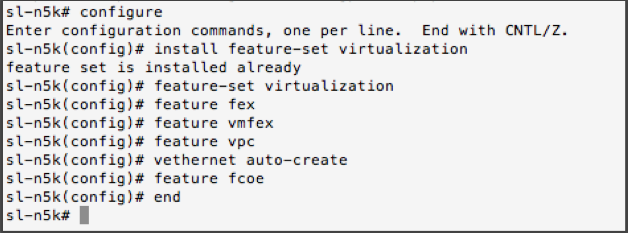
Run the following commands from Cisco Nexus 5000 CLI to enable and install all vmfex related services.
- 1. configure
- 2. install feature-set virtualization
- 3. feature-set virtualization
- 4. feature fex
- 5. feature vmfex
- 6. feature vpc
- 7. vethernet auto-create
- 8. feature fcoe
- 9. end
- 10. copy running-config startup-config
- 11. reload
Example Screenshot:
Define port profiles for dynamic Virtual Machine ports
We need to create port profiles on Nexus 5000 for dynamic ports. These port profiles will be exported to vCenter DVS as port groups. Users will be allowed to choose the port profile/port groups for VMs. Please click for more information about port profiles.
Following is an example of port profile creation. Run the following commands from the Nexus CLI:
- 1. port-profile type vethernet vmfex-default
- 2. switchport mode access
- 3. switchport access vlan 200
- 4. dvs-name all (specifies the vcenter dvs to which the port profile is exported as a port-group. with the keyword all, the port profile is exported to all dvs in the vcenter.)
- port-binding dynamic (specifies dynamic port binding. the port is connected when the vm is powered on and disconnected when the vm is powered off. max-port limits are enforced. the default is static port binding.)
- 6. state enabled
- 7. end
Example Screenshot:
Enable vntag on applicable ports
We need to enable vntag on the interfaces where VIC is connected
- 1. configure
- 2. interface ethernet <Port number where VIC is connected>
- 3. shutdown
- 4. switchport mode vntag
- 5. no shutdown
Example Screenshot:
Configure SVS connection to vCenter
Before starting this configuration, make sure that the Nexus switch management ip is reachable by vCenter server. Following is an example on SVS connection creation.
- 1. configure
- 2. svs connection <svs connection name>
- 3. protocol vmware-vim
- 4. vmware dvs datacenter-name <vCenter datacenter name>
- 5. dvs-name <vCenter DVS name>
- 6. remote ip address <vCenterServer IP> port <vCenter Port> vrf management
- 7. install certificate default
- 8. extention-key cisco_nexus_fex
Example screenshot:
ESXi Configuration
Download Cisco vDS – VEM Software from Cisco.com. We need VEM agent running on the ESXi hosts for adding them to the DVS. You can download the latest VEM software from here.
- After download open the vmfex.html and locate the correct VEM software version for your ESXi.
- Using scp copy the zip/vib file to your ESXi server
- Install the software on the ESXi server (Use esxcli software vib install to install the VIB file on your server)
- Reboot your server for changes to take effect.
The configuration settings that are specific to Nexus 5000 switch and ESXi are now complete


