In this final part we discuss on the configuration that needs to be done on vCenter to enable VMFEX.
 First step is to install vCenter and login to vCenter as administrator user. Now create a Datacenter where you want to add the hosts which will participate in VM-FEX. In this document, I use the datacenter name DC1.
Configure SVS connection to vCenter
Once the DC is created in vCenter, login to Nexus 5000 Switch using its management IP.
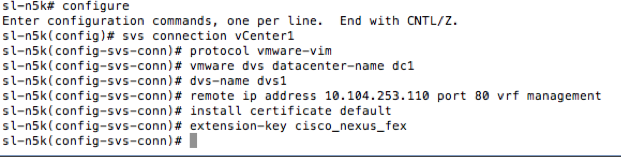
Before starting this configuration, make sure that the Nexus switch management ip is reachable by vCenter server. Following is an example on SVS connection creation.
- 1. configure
- 2. svs connection <svs connection name>
- 3. protocol vmware-vim
- 4. vmware dvs datacenter-name <vCenter datacenter name>
- 5. dvs-name <vCenter DVS name>
- 6. remote ip address <vCenterServer IP> port <vCenter Port> vrf management
- 7. install certificate default
- 8. extention-key cisco_nexus_fex
Example screenshot:
Install Cisco_nexus_vmfex plugin in vCenter
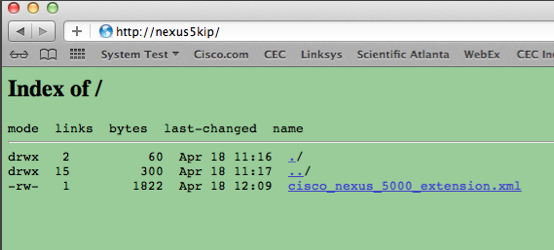
We need to install the vmfex plugin in vCenter to establish a connection between Nexus 5000 and vCenter server. To download and install the plugin:
- From the Nexus 5000 CLI, run “feature http-server”
- From the server where vCenter is installed open a web browser and type nexus 5000 management IP
- Download cisco_nexus_5000_extension.xml from the page
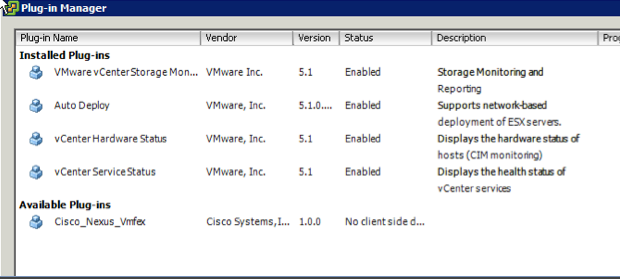
- Connect to vCenter server using vSphere Client and go to Plugins –>Manage Plugins
- Right click on the white blank area and select “New Plugin”
- Click on Browse and choose the above downloaded XML file.
· Activate and verify the SVS connection
Run the following commands on nexus 5K to activate the SVS connection.
- 1. configure
- 2. svs connection <SVS connection name which we created in Configure svs connection to vCenter section>
- 3. connect
Example Screenshot:

You will see some activity in vCenter Tasks and Events pane during this time. DVS will be created.
Example Screenshot:
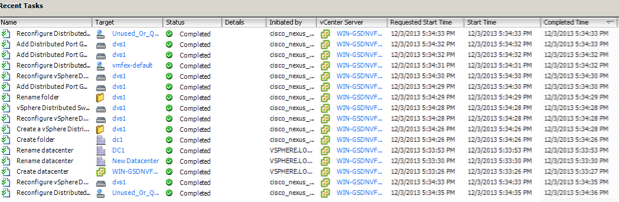
Note: vCenter administrator cannot edit DVS created in vCenter during the above operation.
Now we need to add the ESXi host to the vCenter first and then to DVS. Login to vCenter server as Administrator and perform the following steps:
- Add the ESXi server to vCenter server
- Identify the physical ports that are configured for vmfex.
From vCenter go to Home–> Inventory–> Networking
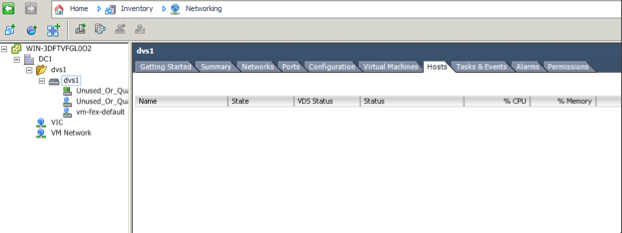
- Select the DVS that we created as part of vm-fex configuration
- Right click on DVS and select Add Host
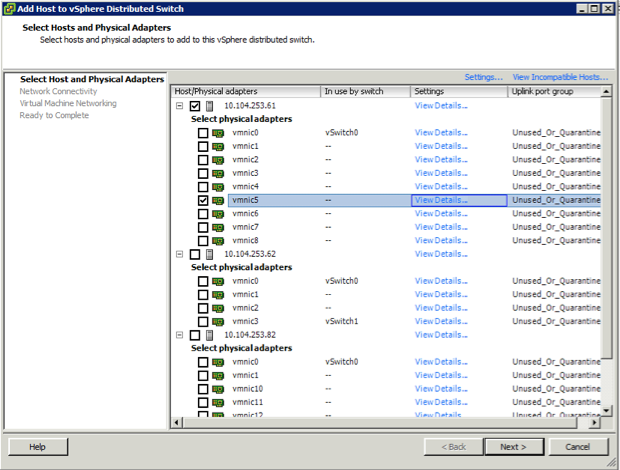
- Select the host from the list and choose the NIC that you want to be used for VMFEX
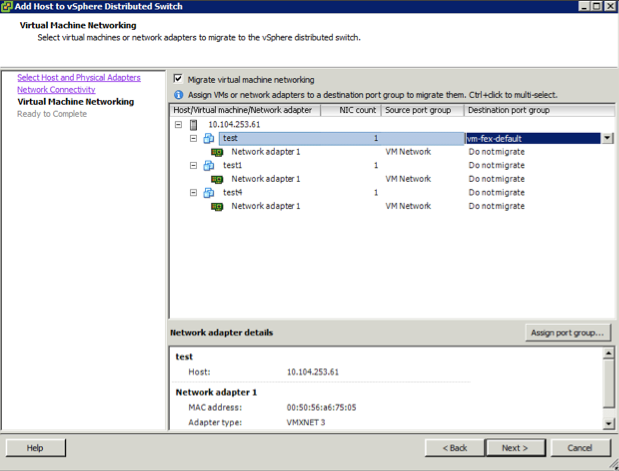
- Choose to migrate VMs to new DVS setup if you wish to. You can perform this operation after adding the host by editing the network settings of the VM. If you choose to migrate VM networking, choose the VM and change the destination port group.
- Verify the settings and Finish the operation.
- Create a VM and choose DVS port group as destination port group in “Create Network Connections” page.
- Power on the VM and check the dynamic port added in Home–> Inventory–> Networking–> DVS created–> port group created–> Ports

Connect to Nexus 5000 and run the following command to verify the configuration:
show interface virtual status vm-fex
The port shown in vCenter should be shown in Nexus 5000 also. Now as soon as we power on any VM that has the uplink as DVS port group, a virtual port will be created with settings specified in port-profile in nexus 5000 and will be deleted as soon as the VM is powered off.